If you have an Android device with a MediaTek Chipset (MTK), you would need MTK USB Drivers to be able to flash firmware, move files or even go root your device. Unlike the other complicated guides, this tutorial is simple, visual and error free even for beginners.
Why You Need MediaTek USB Drivers
The MediaTek USB Driver identifies your Windows computer and allows you to communicate with your MediaTek device. You install these drivers if you need to flash your device’s firmware, you want to debug applications, or you simply want to seamlessly transfer files from your system to device.
- Upgrading to Custom ROMs: Unlock new features and performance boosts.
- Fixing Software Issues: If you have a boot loop problem then you need to flash stock firmware.
- Rooting & Unlocking: Get full control over your device using specific tools.
Pro Tip: The incorrect installation of drivers may bricked devices, and there some users claiming this. Following this guide carefully, you can skip out on such issues anyway!
Step-by-Step Guide: Installing MediaTek USB Drivers on Windows
Follow this simple process to install MTK USB Drivers for Windows:
Step 1: Download MTK USB All Driver for Windows
Step 2: Extract the File And installation
Once downloaded, right-click on the ZIP file and select the zip file and Extract All to create a folder on your computer.

Then open the folder and double click to run the MTK_USB_All_v1.0.8.exe

Tip: Keep your drivers in an easily accessible folder so you can find them quickly when updating or reinstalling.
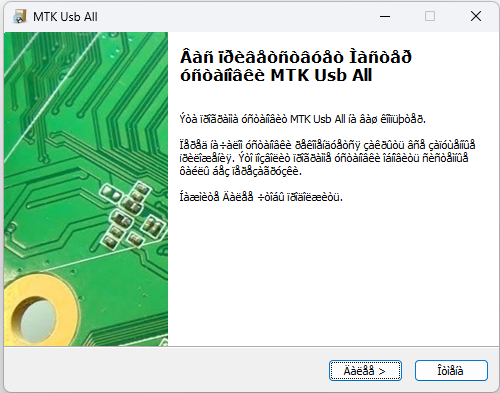
You will get Installation Wizard Setup, click on the Next button.

Once the driver installation is completed then click on the finish button to exit the Wizard. Done to install the MTK Android USB Driver to your PC.
Step 3: Restart Your Computer
After the installation completes, restart your computer to finish the process.
Pro Tip: Always use a high-quality USB cable to avoid interruptions during flashing.
